CLICK HERE FOR FREE BLOGGER TEMPLATES, LINK BUTTONS AND MORE! »

Wednesday, February 18, 2015

Men's shirt sleeves turned into toddler skirt.

The hubby had his mom turn his long sleeved work shirts into short sleeved ones. I was going to throw out the cut sleeves when I figured I could salvage the fabric for some American girl clothes or something. Instead I started thinking about other things to make and came up with the idea to make some skirts for Dimples.      
 

I didn't make a tutorial on how to do these. However, they were pretty simple. I cut each sleeve along the hem and laid each opened sleeve side by side. I then measured my daughter's waist and took in account my seam allowance. After that sewed each piece together and hemmed up the bottom and viola a cute little skirt.

Tuesday, October 1, 2013

Hand Print Ballerina Tutus

This year for Razy's birthday we had a ballerina party.  We wanted to make it special and send each of the invited ballerinas home with a party favor.  What better than their very own tutu and a handprint tutu.  Want to make your own? Your in luck, they are super easy.
Supplies:
Stretched Canvas (or even paper)
Pink Card stock (or any color you would like
Two colors of pink (or any color you choose)
Ribbon
Hot glue
mod podge
lighter to burn ribbon edges

Lets Get Crafting:
1. Take your card stock and fold it in half to cut out n symmetrical leotard.  I actually found that doing this on a piece of paper and then tracing it onto the card stock was easier and you didn't get a line down your card stock. 

2. Mod podge one side of the card stock and lay it onto your canvas (or paper).

3. Using the light colored paint, paint your child's hands and have them press four times (twice for each hand) onto the canvas under the leotard for your tutu. 

4. After washing your child's hand, paint it in the darker color and place one print of each hand to make the tutu look fuller and have a little depth.  Let dry.

5.  Cut a piece of ribbon to fit across the bodice, above the tutu prints.  I like to burn the edges to keep from fraying to to make it look cleaner.  Hot glue the ribbon down.

5. Tie a bow, burn the tails and hot glue it onto the ribbon you already glued down. 

6.  Hot glue ribbon to the back of your canvas so you are able to hang it.

7.  Sit back and smile at how cute your project turned out.  Don't forget to write the date on the back so you remember how old your little one was when they made this cute project.

Sunday, April 14, 2013

Homemade Graham Crackers

It is a beautiful Sunday afternoon.  JBody is outside with the kids and I am inside preparing a yummy treat for the family.  Well part of a yummy treat.  There is no wind and the sun is out, so JBody and the kids have decided they want to have a fire in the backyard in the fire pit.  So what do you do with a fire pit?  Roast marshmallows for S'mores of course.  However, with Dimples eating solids now we are all out of graham crackers.  No worries...Pinterest came through once again I was able to find a recipe for homemade graham crackers.  The original recipe is from Our Best Bites.  However, I had to modify it by using Agave Nectar instead of honey because Dimples isn't a year yet.  The substitution worked wonderfully. 

I love making things homemade.  Not only do the kids enjoy fresh home baked goodies, but I know exactly what is going into them. 

 
I take no credit for the following recipe.  In fact I encourage you to head over to Our Best Bites to check out the original recipe and to see all the other wonderful recipes they have posted. 
 
Homemade Graham CrackersRecipe lightly adapted from Our Best Bites

Ingredients:
1 1/2 cups all-purpose flour (measured by lightly spooning the flour into the measuring cups and leveling with a flat surface), plus more for working
1 cup whole wheat flour
1/2 cup wheat germ
1/2 teaspoon salt
1 teaspoon baking powder
1 teaspoon ground cinnamon
1 cup (2 sticks) butter, softened to room temperature
3/4 cup light brown sugar (you can use dark if you prefer a richer flavor)
2 tablespoons agave nectar

Instructions:
Whisk together the flours, wheat germ, salt, cinnamon, and baking soda in a medium bowl. Set aside.
In a large mixing bowl or the bowl of a stand mixer, combine the butter, brown sugar, and agave. Mix on medium speed until light and fluffy, about 2-3 minutes. Reduce speed to low and add the flour mixture. Beat until combined.
Lightly flour a work surface (a silicone rolling mat or wax or parchment paper work great because you can transfer the dough directly into the fridge) and turn the dough onto the floured surface. Roll the dough out until it’s 1/8″ (you may need to work in 2 batches). Refrigerate for 10 minutes.
Preheat oven to 350.
Cut the dough with your favorite cookie cutters or a fluted pastry wheel (in my case a pizza cutter) and place on a baking sheet. Refrigerate or freeze for another 10-15 minutes or until the dough is very firm. If desired, use a fork to prick the dough to ensure even baking. Bake for 10-14 minutes or until very lightly brown around the edges (it can be a little tricky to tell), being careful not to overbake. Makes about 2 dozen graham crackers, although it really varies on how thick your dough ends up and how large you cut the graham crackers.

My Tips
*agave substitutes nicely in this recipe.  Just sub for same measurements.
**This recipe doubles nicely.  Just takes a while. 
***WATCH CAREFULLY.  I ended up baking my crackers for 9 mins. 
****I stopped worrying about pretty crackers and cut my rolled dough with the pizza cutter.  I then placed the whole sheet into the freezer and then broke them apart before baking.  This was a lot faster. 
Can't wait to try these with the kids when we make S'mores this evening.
***UPDATE*** 
The crackers held up nicely for S'mores.  Doble told me that I should make them all the time for S'mores and that they make the best ones ever.  SUCCESS!


Wednesday, April 10, 2013

Banana Oat Breakfast Bars & Baby Banana Finger Food Snack

What do you do with really ripe bananas?  You make breakfast cookies of course. 
These are very simple and packed with flavor.  And did I mention super healthy.  No egg, no flour, no sugar!  My kids ate them up quick too. Original recipe was found HERE.
 
Ingredients
1 1/2 cups oatmeal, quick or old fashioned ~ uncooked
2 ripe bananas, mashed
1 cup unsweetened applesauce ( I used our homemade applepearsauce)
1/3 cup raisins, or craisins (the craisins give it a nice sweet bite to it)
1/4 cup chopped walnuts, toasted (or regular, if you prefer) ** see below
1 tsp vanilla extract
1 tsp cinnamon (or more, to taste) 
 
**We have a nut allergy in our house so we omitted the walnuts however, I think the next time we make them we will add hulled pumpkin seeds, or sunflower seeds.

***The possibilities for add in are endless.  How about chocolate chips, coconut, other dried fruit, seeds, etc..  Over at Watching What I Eat, she has other breakfast cookie ideas.

Directions
Preheat heat oven to 350 degrees.

Mix vanilla extract & cinnamon into the applesauce.

Blend applesauce mixture with all other ingredients & let sit for 10 minutes

Drop cookie dough, by spoonfuls, onto a parchment paper lined cookie sheet & flatten cookies into rounds.

Bake approx. 20 - 30 minutes, or until golden & done.

Remove from oven & let rest on cookie sheet for 5 minutes, then move to cooling rack.
 
Store in a covered container when completely cool.


And we can't forget our little Dimples.  She can't have the craisins so we made her her very own rendition. The original recipe can be found HERE.  However, I omitted the salt.  Babies don't really need the salt and they tasted fine without it.
 
Ingredients
2 cups quick oats
1/4 tsp salt
1/4 tsp cinnamon
1/4 tsp ginger
1/4 tsp nutmeg
2-3 overripe bananas, mashed
1 tsp vanilla extract
3 Tbsp coconut oil, melted
 
Directions
Preheat heat oven to 350 degrees.

Grind 1 cup of oats into a powder and put into a bowl
 
Mix the rest of the oats to the powder mix, plus the salt, cinnamon, ginger and nutmeg

Mash bananas
 
Mix vanilla and coconut oil to the bananas, then mix it into the dry ingredients
 
Pipe dough, onto a parchment paper lined cookie sheet
 
Bake approx.12 minutes, or longer if you prefer them to be a little harder

Remove from oven & let rest on cookie sheet for 5 minutes, then move to cooling rack.
 
Store in a covered container when completely cool. 


I used my vitamix to grind the oats, however, a blender or coffee grinder will do the trick.


To pipe, place the dough into a strong Ziploc bag and cut the end off one side.  Be sure to close the top especially if you will be having little helpers.


After awhile he got tired of piping and asked if he could make lines that we could just cut.  Smart kiddo.  Little did he know that is what the original blogger had recommended.  


She loved them....and so did everyone else.  I found myself sneaking pieces from her whenever I would feed them to her.

The end product almost looks like cooked sausage.  My sister in law actually asked what I was feeding her. 
 
Do you have any healthy snack recipes you would like to share?  They could be for baby, yourself, or the older kiddos.  I would love to hear and try them.

DIY Dishwasher Detergent

So the other night it was about 11 o'clock and I was just about to go to bed.  However, I remembered that I needed to start the dishwasher.  OOPS we were out of detergent!!  I remember seeing a pin on pinterest for a DIY detergent so I quickly headed over to pinterest.  After some searching and finding formula that I actually had all the ingredients to I set out to make it.  It was super quick and easy. 
 
I rounded up my ingredients
2 cups Baking Soda
2 cups Borax
1/2 cup Kosher Salt
 
 
Some recipes call for washing soda and citric acid, however I didn't have either.  Baking soda will do the same thing as washing soda. Although many people like the citric acid (or lemon Kool-Aid) it can actually leave streaks and scratch your dishes over time.  It will however help with the clumping of your detergent.  I have yet to get clumps since it has only been a couple of days, but when and if I get them, I have read you can put a panty hose with rice into your container of detergent.
 
You may also substitute Epson salt or another course salt for the Kosher salt.  The salt is used to help soften your water and it helps as a scouring agent to clean your dishes. 

 
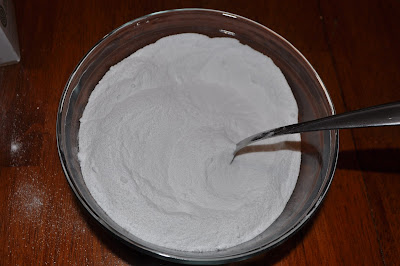
Mix up all your ingredients.  No need to used special containers to do so since you will be using the same stuff to wash with!

The recipe actually fit perfectly into a quart sized mason jar. 

Vinegar can be added to your rinse cycle to help with any streaks and fogging on your dishes.

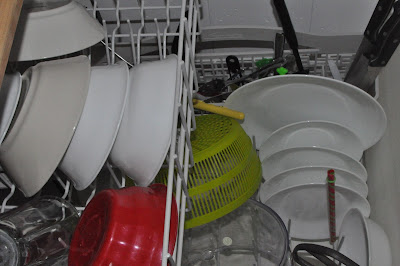
Here is a picture of my dirty dishes.  I rarely rinse my dishes before hand and I wanted to see if this detergent could cut through all the grime I leave on my dishes. 

1/2 TB in each compartment will do. 
1tsp vinegar in the rinse cycle if you choose to do so.

 
Look at those sparkly dishes.  Looks like someone moved my straw from spot to another.  I couldn't get a picture fast enough before the kids needed to eat breakfast. 
 
I have been very pleased with the outcome of my dishes.  I couldn't get a good picture without a glare of my glasses, but the ones with this detergent came out CLEANER than the old store bought stuff. 
 
The best part is.....wait for it.....This detergent cost me $0, Nada, Nothing to make.  Okay it would have if I didn't have any of the items.  But most of you probably already have all three things in your house.  That made the whole thing so worth it to me.  I really didn't want to make a trip to the store at 11pm and I really really didn't want to wash them by hand.  I know call me lazy, but there are other things I would much rather be doing with my time. 
 
Let me know if you try this DIY out or not.  Or do you have another homemade cleaning recipe you would like to share?  I would love to try it out!
 
After I run out of laundry detergent I plan on making my own.  I will have to let you know how it turns out.

Monday, April 1, 2013

Spring Break {Day 1}

Like most schools, ours is on spring break.  In the past we have done a Staycation Destination Game and Project Pinterest.  Once again we are staying home. However this time I am not putting any pressure to do anything that must be posted daily or that has to be accomplished.  I just want to spend some time with the kids and see where each day takes us.  The weather is SUPPOSED to be better than it has been in the past.  Most years we enjoy spring break in our rain boots.  This year the weather is going to have a few sunshiny days and we are hoping to take advantage of them. 
 
 
Day one found us at the park. Dimples was introduced to bubble for the first time and seems to really enjoy them.  She tends to be a little cautious of some things and bubbles were one of those things when she first saw them.  After the park we went to Dairy Queen for a small cone!!  Mmmm a rare treat lately, as mommy is trying hard to eat better. 

It was also the first day of the year that we were able to go and enjoy the park.  Lil' E kept telling me thank you over and over.  I guess I need to take them out more often.  It just has gotten harder now that there are 4 kids against one.  That is not to say we don't do anything fun.  They have all been keeping me busy with sports and school and I did take them to the zoo (by myself) in February.  The girls and I also go out for walks while the boys are at school.

Hopefully I will keep you updated with the fun things we do during spring break, but know that if I don't we must be having so much fun that there is just no time to post. 
 
What fun things do you do with your little ones during spring break?  Do you stay home? or travel?  Are you lazy?  or do you keep busy?  I would love to hear from you.